Powered By Blogger

Ready to stitch

It has come down to the wire now with this little piece. By the way, it is17.5 inches by 20 inches as it stands at the moment. I will be making a practice piece to try my new needles and new threads before I work on the quilt top.There is tearaway stabilizer as well as a lot of layers of Wonder Under and , of course, the cotton fabrics to get through. Eventually, once I have done some thread painting, I will add the batting and backing and actually quilt it too but for now it will be all edge stitched with invisible thread , then some thread painting. It is going to be a HOT Canada Day weekend ( and our 46th anniversary on the first too) so I shall be indoors , sewing merrily and staying cool.
This is what I will be working with. You can see that I have altered the top left corner a little and am ready to sew. Good luck to me !

For the Needle and Thread Network

A fuzzy photo of a stunning specimen of Fatsia Japonica in my cousin, Lorraine's garden in Lancashire.

My interpretation so far! It is getting there :-)
This is a long slow process. It is great fun but also greatly frustrating. All of my fabrics are my own hand dyes and I am very happy about that. However, try as you might, you sometimes cannot get just the perfect fit for that reddish berry in the top right of the big bunch, for example. The berry itself is ok, but the little light patch on the blossom end is elusive so far. I will have to spread out my fabrics and shop around for the perfect spot to cut. All my lovely fabrics are looking more and more like holey cheese! Holey cheese, Batman! Hope I can find a bit today as it is making me crazy. I chose NOT to put the lighter bits behind those berries on the right and am now suffering the consequences of artistic licence. C'est la vie artistique, I guess. Wish me luck.

Check out needleandthreadnetwork.blogspot.com

Feather Inchies


I think these four Inchies are my very lamest EVER and I almost did not post them. I am tired and lacking inspiration just now. Sorry about these , but here they are. The good thing was that it WAS a little tryout for the Neocolour crayons! Lots of possibilities there - once I make friends with the colours!

By special request


Here is a closeup of my little clump of fruit in the upper left corner. The dark green background was layer #1, then the stems of the berries, then the berries themselves, and lastly, they little patches on the blossom end of the berries.Right at this stage, there are four layers here.
Most of the Fatsia project is done with raw edge, fused applique. I will edge stitch eventually but at the moment, it is fused to a background of tearaway stabilizer. That is just what I had. It does not need to be tearaway. The main stem has a turned edge but the rest is simply cut and fused just now. More layers will be added soon. I am using Wonder Under as my fusible material. I like it. It is not too thick to stitch through when all of the layers are finally added, and it sticks well. I like the paper backing too so I can draw or write on it if need be-just like with Steam a Seam. I LOVE Misty Fuse because it is SO fine and SO flexible but it is a bear to cut out unless you have to make a big acreage of fusible fabric to cut from . With the Wonder Under, I can cut what I want and with so many different layers, that is a definite boon!
Here is the main stem with a turned edge. Note the staystitching and the raw edge of the little flange of seam allowance which will tuck under the berry that will sit on top of the stem here.

These two photos, above and below show closer up on the top left and top right berries. You can see where I will need to do some good stitching to cover some wee gaps in the lower photo. No problem! If we had not intended to be able to do that, god would not have given us zigzag stitches of varying widths!

Last but not least, the leaf! The background could have been lighter as I want light coloured veins. Once again, zigzag to the rescue! A nice satin stitch in a paler, limey yellowy green will do nicely.
The main trick to this is to study your photo carefully and choose your fabrics VERY carefully. Write LOTS of notes to yourself and DO NOT FORGET SEAM ALLOWANCES FOR TUCKING UNDER THE LAYER ABOVE!
___________________________________________________________________________________

And here is a little bit of How To...

I studied the photo, looking at the biggest berries. Here is my strategy. Yours may be totally different but this works for me!
Each berry is numbered and LOTS of notes are written on each one.
Before I cut them all apart, I mark the places where one shape over or underlaps another and I be sure to add seam allowances where appropriate. My red lines mark those spots.

We are looking at berry number 4 , dead centre in THIS picture
I take note of colour and shading and choose a spot from one of my fabrics and fuse the freezer paper pattern to the fabric. Then it is cut out LEAVING SEAM ALLOWANCES WHERE NECESSARY. There are TWO Seam allowances on Number 4.
The back side of Number 4. NB, some of this colour will eventually be covered up by the blossom end patch.
Here is patch number 4 set in place on the quilt front. Note that none of this will be fused down until I add fusible to the back of each patch and until I look at the overlaps making sure everything I want covered IS covered.
I hope perhaps this removes some of the mysteries you have been asking about and encourages you to try one yourself. Small suggestion- if you have never done this before, pick a very simple photo to work from!

The continuing saga of the Fatsia Japonica

You know, the worst problem I have with a camera, is holding myself AND the camera still enough to get a good shot! Occasionally, I DO manage but not often enough. And why do I not use a tripod then, I hear you ask??? Well, because I am a lazy toad, a veritable slug at times.

I have been photographing the Fatsia project and it appears to be VERY crooked. It IS slightly crooked, but not as much as it seems in the picture. My angle, the camera angle and the board's angle all added up to a crooked looking piece of work in progress. Do NOT be alarmed! It will be fine and dandy and maybe next time, I will have the smarts to get it all lined up nicely BEFORE I shoot the pics and edit them ;-)

Now, drum roll please.....
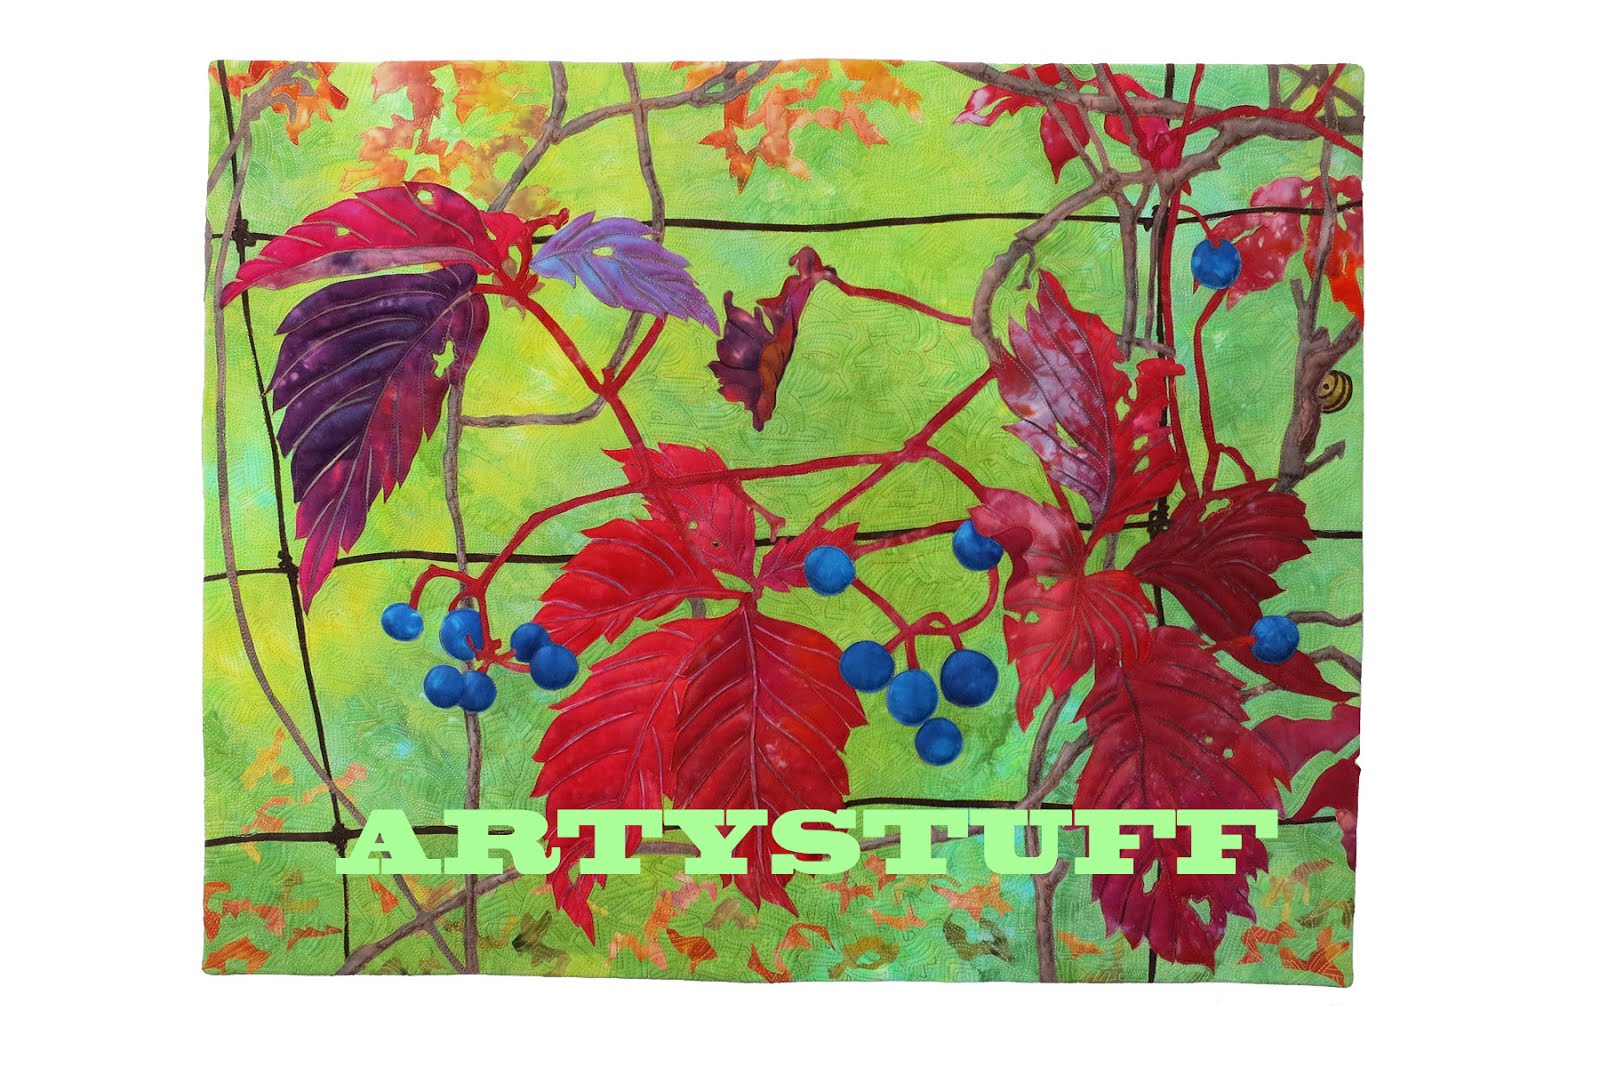
You see what I mean! Apart from the little blosson end bits on the top right berries, I am ready to study the background now and decide what needs adding, if anything, then start on the big fruit in the foreground.
I have been staring at those blossom end bits on the big foreground fruit , trying to decide how best to capture the feeling and I came up with Shibori! Never done it before and I may not have done it according to Hoyle, but who needs him! I did it, results to follow, but may have erred a bit on the side of over-watering-down the dye colours. Time will tell but I DO like the effect! What do you think?
I like this ! Very cool shapes and the white on white is pretty nice!

Here is the whole ribbon dyed and being untied. What a job! I sewed the thread rather than just wrapping. Never do simply what you COULD make much more complex!

Results! Too pale? We shall see. It is pretty though and I SHALL use it for something, if not the Fatsia.

more of the ribbon- it is about two inches wide

- and more...

And the whole piece!
Well, experiments over, time to get busy now. This was great fun and my fingers are SO pretty now!( actually not bad, just a tad purplish . Fingernails not really affected!) OK, I am off to work at step... the next........

The Fatsia project

On we go, slowly but surely. I REALLY am rusty but am getting back into the groove. This was a crazy thing to start with but I WANT to do it so much!!

Here is my initial drawing transferred from my pattern to a sheet of tearaway stabilizer. Everything will be attached to this and it will keep things nice and wrinkle free as I do some thread painting eventually.
The  background of multi green hand dyed fabric is in place and the big stem holding the main berries has been fused in place.
Now the fun begins! I am now working my way through the many many berries and the remaining details. LONG way to go yet but, so far, so good. 
The next step will be the centres of a few of the berries in the top left cluster and then I will go to the top right ones. Once they are done, I will check for any other things that I want in the background before I tackle the big bunch of fruit in the foreground.Once the berries in the big bunch are fused down, I will not be able to slip any background bits behind them so I want all that stuff down first.

The house is a disaster area because this is VERY complicated and I have not gotten back into a routine yet. Little bits of paper, Wonder Under, freezer paper and fabric are everywhere! Do I care? Well, yes and no- ya know!It will all get cleaned up and things MAY get back to normal some time . Stay tuned for further developments. My back is tired now and my brain hurts. May be done for today. We'll see!

The beginning of the Fatsia Japonica piece


This gorgeous shrub of almost tree sized proportions grows in a tiny, lovely garden in Leigh, Lancashire, belonging to my third or fourth cousin, Lorraine. (I will need to sort the relationship carefully) I absolutely fell in love with the whole bush- big, palmate glossy leaves and stunning fruits about the size of a marrowfat pea .The berries were ripening at different speeds so there was a glorious spectrum from pale creamy olivey green through brilliant limes and into reddish purples ending up with fully ripened fruits of inky blue black. Maybe I am mad to tackle this but I REALLY want to do it. I have dyed some cotton in various variegated colours and have finished the initial drawings,printed and enlarged the pattern and have traced that onto freezer paper. Almost lunch time now so I shall eat and then - begin! I have been staring at my enlarged photo and the pattern and picturing it done in my mind. Stay tuned and we will see how crazy I really am !

Dyeing to get started

I have a couple of projects I am DYING to start on but have decided to use my own hand dyed fabrics this time, exclusively if possible. To that end, I have been down in the cellar in the cold getting covered with pretty coloured splashes here and there. Old clothes make that not a major problem. I just need a few more pieces , some paler greens and yellows and maybe a reddish orange, not too intense- and I am away to the races. This is what I have done in the past few days . Now, I am DYEING to make a start. If I can get paler bits done overnight, I shall begin on the first one tomorrow. I am excited about this as I have not dyed my own stuff for YEARS!!! Good luck to me :-)
There are lots more colours involved than appear here as the fabrics are folded up, but you get the idea.

Animal Inchies

What is it that attracts and holds our attention with any animal, even the human animal? For me, it is the eyes! Once you have looked a tiger in the eye...Remember looking into the eyes of your first true love? Eyes show the character of any animal. Here are a few ...
The little AyeAye is ALL eyes! Nocturnal by nature, they HAVE to be all eyes!

Big cats, Lion, Tiger, Leopard etc are ever vigilant and seem to see and to know everything.

A fish is a strange fellow. No real character seems to show through his baleful , inscrutable stare.

Frogs are vigilant too but they are enigmatic and do not look too friendly generally.

Owl eyes are some of my favourite. Partially hidden by fluffy feathers, they observe in great detail ,by day , or especially by night! Owl eyes suggest strength of character and great wisdom to me.

Oh, nobody loves the Rhinoceros much. If you ask the reason why? They'll say it's because of their scaly touch, or their hard and glittering eye! Not THIS Rhino. He just looks sad and lonely, no sparkle in his eye- and besdies that, he has to contend with that Bodger on his Bonce! 

I really AM still here!

These really DO relax me ...

...and they are doing wonders for my right hand...

I am regaining the great control I once had...

...before I had some minor surgery on that hand.

Almost every day while we were away in the UK...

I Zentangled and drew little bits of stuff..

..and Zentangled :-)

The coloured bit on this one is done with Caran d'Ache water soluble wax pastels! More on those in a later post.

This one was done on our flight to England on 01 May. Bit bumpy here and there but it helped pass the time while I could not sleep!

One of the "white lilies" (actually narcissus poeticus) that seem to grow wild everywhere in Kintyre. Fabulous fragrance too. I had some in the garden, but they have disappeared ;-(
And, I have been working. I have not done Inchies :-(. I am working on a couple of new pieces and have been dyeing all afternoon. AND, I have been doing lots of doodles, Zentangles, whatever you want to call them. I did at least one almost every day we were away including the flights over and back, bumpy rides and all. I have been at it every day since we got home too with a few exceptions. It has been a hard time to get any serious work going under the current circumstances but I hope you enjoy these.

Veil Inchies

I am still not up to speed here somehow! Must be old age creeping ( or sprinting) up! I find myself overwhelmed by all I have to catch up with but maybe I am just NOT going to catch up, but rather, start where I am and carry on : -) I think THAT will be my plan.

I have done four lame-ish VEIL inchies this week- unusually late , but it has been a hard weekend. That most tenuous , mysterious of all veils was parted suddenly in our family over the weekend when we lost a dear family member. The little Inchie with the watery sunset behind a waving veil is to represent that delicate veil that exists between life - and Eternity.
Sadly, the daily news keeps us abreast of stories where we see this particular veil

On a MUCH cheerier note!


And last but certainly not least, is that very heavy veil employed by governments, law enforcement agencies, manufacturers and such- THE VEIL OF SECRECY! I KNOW it is important, but.....

Alright, folks, that is the best I can do today and sorry it is now Every Inchie TUESDAY!