I have finished the Big Peony now and it hangs in the sitting room at the moment. In an attempt to give my poor old hand a rest, I have been playing with the Gelli Pads. I have a ton of fabric drying downstairs so cannot show you that just yet but here is what I DO HAVE to show you!
 |
| This is the second homemade Texture Plate, still drying |
 |
| And this whiter one is the first one, dry, hard and ready to use. |
I saw a "recipe" for making your own texture plates for Gelli Arts pad . It is built on a little canvas board using Molding paste and stencils, tools for making marks etc. I have been collection lots of little bits for combing, drawing and stamping into the painty surface of the Gelli pad as well. My first attempt is dry and hard now and I have tried it several times and IT WORKS!!! It is amazing. My second plate is made and drying as I type.
 |
| Here is the first one starting to get a nice patina of paint- Looking pretty! |
 |
| Closeup #1 of the paint on the plate- Gutermann and Metrosene thread spool bottoms! |
 |
| Closeup #2- a commercial stencil |
 |
| Closeup #3- same stencil but decorated using a flat palette knife and pulling it straight up off the wet paint!! |
I have been pulling prints on fabric first, then a "ghost print" on paper for fun. It seems to work quite well. I am using Lumiere paints as well as Open Body acrylics from Golden- SUPER colours! To date, I have done only some backgrounds to play with but hope, eventually, to do a series of little quilts- Whole Cloth, albeit SMALL cloth, to make a little grouping with my first Gelli Quilt. It is fun, easy and easy on my hand .
As soon as I have some dry fabric samples for you, I shall add them to the post. Meantime, enjoy this steamy Sunday in July 2013.
_________________________________________________________________________
OK, I said I would post the backgrounds I have already done . They are dry enough now. These are just bases for more work but you can see what is happening. I want to try some different colour combos too. This limited palette is getting tedious!!
 |
| This is a bad picture of the first piece I did a while ago so you get an idea of where I will go with these. |
 |
| Now, this is just a series of prints, some multi layered , some only a single layer so far. Some are more successful than others. |
 |
| Like this part of this one. It makes me think of roses |
 |
| I really like this part too |
 |
| This will get more layers later |
 |
| This is the whole print I took those two earlier bits from |
 |
Same piece again
|
OK, This is making me crazy! I will try one more time to put the rest of the pictures here at the end. Fingers crossed.....
 |
| Yay! It worked! |
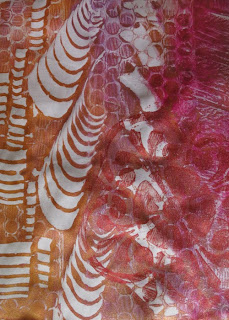 |
| Partly with no stencils, partly with. |
 |
| I did these two earlier and will over print on them .These two are just paint and the Catalyst Wedges. |
 |
| See above! |
 |
| My original homemade leaf stamp with a single colour. More to follow. |
 |
| This is a paper print - just kept pulling ghost prints after the fabric had soaked up most of the paint. |
.

|
| ...and the last one. Not sure if I love it, but maybe ... |


